

This post contains affiliate links.
Now that fall is here and the cold weather has started to set in, it is time to start thinking about bundling up, especially for those little ones! Every year around this time I start getting inspired to start knitting. I use both traditional needles and a knitting loom. Today I will be going over a project for the knitting loom.
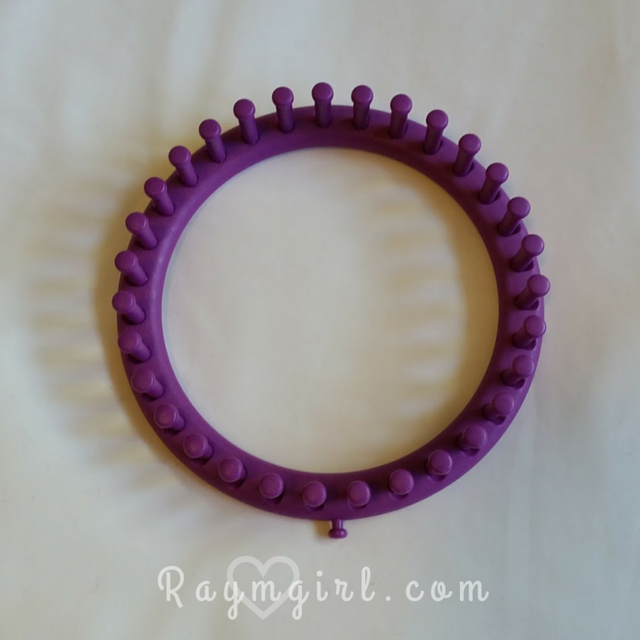
If you have never heard of a knitting loom before, they are wonderful inventions. They are a much simpler and easier way to knit. These looms come in many shapes and sizes but today I will be using the 31 peg round loom. You can find these at any craft store like Joann Fabrics and Michael’s stores, or online at Amazon. A 31 peg loom can come in multiple different colors depending on brand, but they will all generally look like this:
To start your hat project, you will need to chain cast on. This is done using a traditional crochet hook. I use a size K hook for this. The size of your hook is dependent on the size of your yarn and the ease of which it fits in between the pegs of your loom. Click here for a good instructional video on how to chain cast on.
Now it is time to create the band of our hat. After you are done casting on you will use the “Flat Stitch”. Click here for a video on how to create the “Flat Stitch/Stockinette Stitch”. You will continue knitting with the flat stitch for eight rows.

This part may seem a little tricky now. Once your eighth row is completed, take the yarn from the very first row, fold it over and loop it around each peg. Now work the stitch just as you normally would by pulling the bottom yarn up and over the peg. Make sure to tuck in that extra piece of tail yarn as you go!

Once this is done it should look something like this:

After you have completed your band, we start the easy part! Next we will be using the “e-wrap” stitch. This is my favorite stitch because of how quick and easy it is. All you have to do is spiral and wrap your yarn around each peg as if it were in the shape of the letter “e”. Click here for a video to show you how.

Continue to e-wrap each row until your hat measure’s 5.5″-6″ in length from the bottom of your band to the last row worked.

Now that your hat is long enough, it is time to “bind off”. For this project we will be using the “gathered bind off” method. To do this you will need a yarn needle and scissors. First, cut your yarn making sure to leave a generous amount for a tail. For this project, I like to leave between 10″-15″ of extra yarn tail. Next, thread your tail into your yarn needle. Now take your needle and run it under the last peg worked. Pull your yarn up and off of the peg. Do the same with the next peg, and continue until your yarn is no longer on the loom. Click here for a video example.


To finish your hat, take your needle and run it through the center hole of the hat while turning it inside out. Pull as tightly as possible! Next, tie a knot with your needle and yarn. I like to make to 2-3 knots. Then, be sure to take an inch or two of yarn and weave it through your hat to hide it. After this, just snip the extra yarn.

If you liked the yarn used in the photos above, I used Caron Simply Soft. Also, Don’t forget to show me all of your cool crafting! I love to see your work!
Tag @raymgirl on Instagram and Facebook!


